A recent invitation to a wedding created a bit of a dilemma. My Vintage Challenge meant no new outfit so I looked through my wardrobe and chose a vintage Louis Feraud dress which I bought in the St Columba Hospice shop in Edinburgh about 15 years ago, and I still love it as much as I did the day I bought it. It has a black velvet bodice with spaghetti straps and a full black skirt with red rosebuds.
I thought I’d wear it with beautiful red vintage Marguerite Rubel velvet coat which goes with it perfectly. It’s just like this one but with black velvet coloured buttons. However, the wedding was in France and as the date approached it occurred to me, about 10 days before the wedding, that I really needed something lighter to go with the dress. So I searched Ravelry and found a lovely cardigan pattern, ordered some Malabrigo sock yarn and waited for it to arrive. And I waited, knitting time slipping away with each postal delivery that failed to bring me my yarn. A plan B was needed, my stash yielded only DK in sufficient quantities to make a cardigan, so another pattern search yielded this wonderful pattern which I thought would actually suit my vintage dress even better.
Then to the yarn. The DK I had was grey, and I wanted a red cardigan.
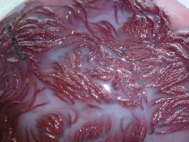
 So into the dye pot went a test skein with a mixture of red food colouring, some watermelon cherry Koolaid to help fix the colour and ensure it stayed on the pink side of the red spectrum.
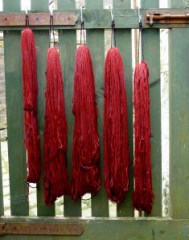
I was really happy with the result so in went the rest of the yarn:
The yarn was sun dried and then ready for knitting.
Luckily the Saturday was knitting group so I had a few extra knitting hours and the cardigan was a dream to knit.
The pattern is top down and more recipe than pattern but incredibly clearly written and I flew through it. The pattern suggests sewing on the front button once the buttonhole is completed and you’ve done a few rows, to make it easier to try on when checking the sizing as you go. How sensible is that, and what does it say about me that I’d never thought to do so before?
Here it is in the final stages of blocking, initially it was blocked flat and then to the mannequin when almost dry, with some sock needles holding the front in place:
I love how the semi-solid yarn has knitted up. The front button is a vintage art deco button and the arm cuffs have smaller versions of the same button.
A bit of a rush but I’m really pleased with the finished cardigan, and it worked really well with my dress.
Encouraged by actually completing a full garment for myself, I embarked on a Manu (pattern by Kate Davies). I’ve been meaning to knit one for ages and thought that the hours spent at airports and flying would be perfect for working through the 16 inches of stocking stitch with which the patterns starts – I arrived home with 13 inches done.


Lovely! And you are so right, the colour came out great, beeing semisolid also added a lot to the pattern.
Ha ha, I thought you’d gone Royal when I read the title of this post! 😉 Lovely cardi. See, it’s nice knitting for yourself, isn’t it 🙂 Hope you’re all well.
Your dye process is great…I love how it has lighter and darker tones to the finished look. Another great cardigan style you may know about is knitting from the top down. With this method you can customize your collar, sleeves and overall length as you knit.
Thank you and Ooops – yes, I forgot to say, this was a top down construction – which I love for exactly the reason you give – that you can customise as you go along and sort the most important areas of fit before you’ve done most of the knitting. I really would recommend this pattern, the link on the blog also takes you to a number of modified versions too, so it’s really flexible and can be modified to your own preferences.